Sunday, April 24, 2011
Guinness and Bailey's Cupcakes
The cupcake is a chocolate Guinness base with a chocolate ganache filling and an insanely alcoholic Bailey's laced icing. Since I'm 5 months pregnant I had to make a separate batch of plain vanilla buttercream icing for my share of the cupcakes. These ended up being a huge hit with everyone, and Jeff has been begging me to make some more of them sometime soon.
Guinness and Bailey's Cupcakes:
Yield: 24 cupcakes
Ingredients:
For the Guinness chocolate cupcakes:
1 cup stout (Guinness)
16 tbsp. unsalted butter
¾ cup unsweetened cocoa powder
2 cups all-purpose flour
2 cups sugar
1½ tsp. baking soda
¾ tsp. salt
2 large eggs
2/3 cup sour cream
For the Bailey’s ganache filling:
8 oz. bittersweet chocolate, finely chopped
2/3 cup heavy cream
2 tbsp. butter, at room temperature
2 tsp. Bailey’s Irish cream
For the Bailey’s buttercream frosting:
8 tbsp. unsalted butter, at room temperature
3-4 cups confectioners’ sugar, sifted
4-8 tbsp. Bailey’s Irish cream (I used 6 and it turned out super strong)
Directions:
To make the cupcakes, preheat the oven to 350° F. Line two cupcake pans with paper liners. Combine the stout and butter in a medium saucepan over medium heat. Add the cocoa powder and whisk until smooth. Remove from the heat and allow to cool slightly.
In a large mixing bowl, combine the flour, sugar, baking soda and salt. In the bowl of an electric mixer fitted with the paddle attachment, beat together the eggs and sour cream to blend. Add the stout-butter mixture and beat just to combine. Mix in the dry ingredients on low speed just until incorporated. Divide the batter evenly between the cupcake liners, filling them about 2/3 to ¾ full. Bake until a toothpick inserted in the center comes out clean, about 17 minutes. Allow to cool in the pan for 5-10 minutes, then transfer to a wire rack to cool completely.
To make the ganache filling, place the chocolate in a heatproof bowl. Heat the cream in a small saucepan until simmering, then pour it over the chocolate. Let sit for one minute and then whisk until smooth. If the chocolate is not completely melted, place the bowl over a double boiler or give it a very short burst in the microwave (15-20 seconds). Add the butter and Bailey’s and stir until combined.
Set aside to let the ganache cool until it is thick enough to be piped (I left mine in the fridge a little too long and it got kinda thick, so watch it close because it cools pretty quick). Meanwhile, cut out a portion from the center of the cupcake using the cone method (I had a filling attachment with my piping bag and used that instead or cutting out a piece of the cupcake). Once the ganache has reached the correct consistency, transfer it to a piping bag fitted with a wide tip and pipe it into the cupcakes.
To make the frosting, place the butter in the bowl of a stand mixer fitted with the paddle attachment. Beat on medium-high speed until light and fluffy, about 2-3 minutes. Gradually add the powdered sugar until it is all incorporated. Mix in the Bailey’s until smooth. Add more if necessary until the frosting has reached a good consistency for piping or spreading. Frost the cupcakes as desired.
Source: Annie's Eats
Monday, April 18, 2011
Bless this House Cross-stitch
I love the way that the project turned out in the end and I love the frame that I found for it; especially since the frame was on sale :) I got the kit on sale at Hobby Lobby for about $5 and I've been working on it on and off for several months. Unfortunately I wanted to post this so bad that I was lazy and didn't take any decent pictures, I just have the ones I took with my phone.
This is one of the first progress shots I took of the project, at this point I had only been working on it for a couple of weeks. I had started in the middle, like you do with all counted cross-stitch, and then I decided to make my way to the left side and work left to right. The piece was pretty long, about 18 inches wide, so working from one side to the other was easier because I could fold over the fabric I wasn't working with.
I was about halfway through when I took this picture. Spring break was a couple weeks after I took this and our 8 hours in the car to New Orleans gave me a huge boost in progress, I just can't seem to find the picture I took :(
Here is the finished product literally right after I finished it. As you can see it still had the creases from where I had it in a hoop.
And last but not least, the finished product all framed up and ready to go on the wall. My favorite part about getting this project done was how excited Jeff was for me that I finished it. This is the first thing that I have made for our first place together, so it has a ton of sentimental value.I already have about 3 or 4 more projects lined up to work on next, but I need to get through these last few weeks of school before I can devote any large amount of time to them.
Monday, January 17, 2011
Disney College Program: My Final Thoughts
Being a Cast Member mean that the perks are pretty awesome. First and foremost, you get to go to Disney World for FREE! And during my program they were having a special promotion that we got to go to the water parks for free too. As a castmember, you also get merchandise discounts, hotel discount, cruise line discounts, and ticket discounts. During the Christmas holiday our cast member discount was raised to 50% off, which was pretty awesome because it applied to all Disney merchandise except for movies and CD's.
Now I will warn you, the housing situation seems great but as one of my friends so adequately put it, she "hates Price Management and their stupid apartments... they can take their stupid rules and shove it where the sun don't shine". The company that manages the apartment complexes absolutely blows. The rules are ridiculous, the security guys are assholes, and if you break a housing rule you can be terminated from the program. The housing is the biggest bad mark on the program in my eyes. I would recommend living in Patterson or Chatham, stay away from Vista. Patterson is the newest complex and where I spent my program. DO NOT LIVE IN A 3 OR 4 BEDROOM APARTMENT because it is 2 people per room meaning there will be 8 people max in an apartment. Though this sounds fun.... you will have no space in your kitchen for anything. I lived in a 3 bedroom so there were 6 of us, and well there was never any space in the fridge at all. Plus 6 girls in one apartment.... no bueno.
Despite the lousy housing situation, I would recommend this program to anyone. I have loved Disney since the very first time I went there when I was 4 years old and I love it even more now that I have been a Cast Member. If you have worries about seeing the backstage stuff and it ruining the magic, don't worry, being a part of the magic is such a rewarding experience. So if you have ever wondered if the Disney College Program is right for you, I say do it. You only live once and to have an opportunity like this is, in my eyes, a dream come true.
Sunday, January 16, 2011
I'm Back
It's good to be back :)
Tuesday, August 10, 2010
Tinker-Belle Cross-Stitch
This project stitched up really quickly, I was able to finish it in only a couple of days, the greatest difficulty I had with it was using the pearl filament thread on Tink's wings and wand. That stuff is a pain in the you know what but in the end it turned out really pretty, with just the right amount of sparkle.
I omitted a part on the pattern that was supposed to go above Tink between her wings because I thought it was silly looking to have her name there labeling her. It is must more appealing and I like the simplicity of it just being sly Tink looking like she is up to something like always.
I had a spare frame lying around and I gave it a couple quick coats of purple spray paint any tada! I'm done. I decided on purple for the frame because it matched the back stitching around Tink, and I thought it would be fun.
Tuesday, August 3, 2010
My First Completed Project of the Summer: posted 2 months late oops
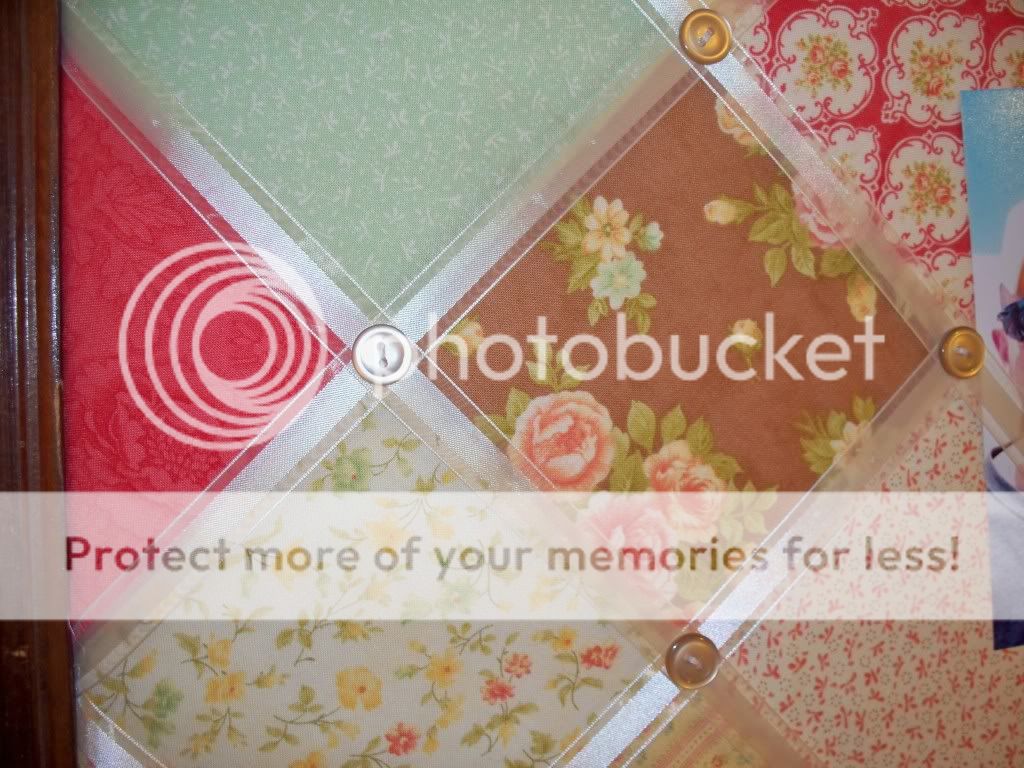
I made it using THIS tutorial from Moda Bake Shop, and I love the finished result. I tweaked the tutorial a little bit just cause a few of the steps I did differently and I used some different materials but overall it's pretty consistent with everything else. I used a charm pack from Fig Tree Quilts called Fresh Cottons, and I love the finished result!
I used a frame that has been laying around my parents garage for almost a year now and I figured if it hasn't been thrown away or used yet then it was fair game for me to have. I toyed with the idea of painting it, but in the end I am glad that I didn't because I love the contrast of the wood grain against the fabrics.
The hardest part of the project was making sure that the ribbon stayed taught enough so that it would hold the photographs when it was all finished, but they all turned out the perfect tightness except for one that is in the bottom corner so it's kinda hidden. I love the ribbon I ended up using because it covers the seams from where I sewed the charm squares together but the edges are sheer so it gives it a cute little effect.
This picture isn't very true to color but it is a nice close up of both the ribbon and the buttons. In the tutorial it called for a variety of buttons but I liked the idea of them all being uniform and cohesive so I used the same buttons for all of the placed where the ribbons crossed.
I wish I would have taken in progress pictures but I always think about doing it after I have already completed the project. I pictures on the board are 4x6 so that gives you some idea of the scale of the whole thing. Also on the frame I mounted hanging brackets on both sides so that it could be hung either vertically or horizontally. I love this project and my mom has already hinted to wanting one for herself.
Saturday, December 19, 2009
My Newest Project

I just finished this the other day and I am super excited that I finished it. I was thinking about giving it to my sister for Christmas but I think I have decided to make the whole set and then frame them. I just bought the Tigger one the other day and I still need the Piglet and Eeyore ones so that I have the whole set. I think they would be super cute for a nursery but I have a few years (like 6) before I have kids, so who knows what I finally end up using them for. The picture quality isn't that great cause my camera is dead and I left the charger at home in Texas and I am in Florida.